
Fermenting chicken feed has got to be the #1 way to help cut your chicken feed cost down by as much as 50%.

Nesting Box Herbs
- Increases egg laying naturally.
- Improves chicken health.
- Deters parasites: mites, lice, fleas & flies as well as mice, rats, raccoons, coyotes, opossums and more!
- On SALE!
- SHOP Nesting Box Herbs
“Why should I ferment my chicken feed?” The fermentation process “unlocks” additional nutrients that are otherwise “locked” inside the feed. It not only is healthier for your chickens, but they will eat less because fermented feed is so nutrient rich.
- Step 1: Gather Supplies to Ferment Chicken Feed
- Step 2: Choosing Chicken Feed to Ferment
- Step 3: Adding Water to Chicken Feed
- Step 4: Stirring Fermenting Chicken Feed
- Step 5: Straining Fermented Chicken Feed
- Step 6: Feeding Fermented Feed to Chickens
- Conclusion: How to Ferment Chicken Feed
- Meet Jenny from Backyard Chickens Mama 🐓

Below is a list of the important ways both you and your chickens will benefit from fermenting your chicken feed. This is followed by simple step by step instructions with photos showing you how to do it yourself.
| BENEFITS OF FERMENTING CHICKEN FEED |
|---|
| SAVES ON FEED COST BY AS MUCH AS 50% |
| INCREASES VOLUME OF FEED |
| CHICKENS EAT LESS |
| CHICKENS POOP LESS |
| UNLOCKS ADDITIONAL NUTRIENTS |
| RELEASES HEALTHY PROBIOTICS |
| BUILDS BENEFICIAL BACTERIA IN THE GUT |
| AIDS IN DIGESTION |
| CREATES HEALTHIER CHICKENS |
| THICKER EGG SHELLS |
| INCREASES EGG PRODUCTION |
| TASTIER EGGS |
| DESTROYS MOLD SPORES ON CHICKEN FEED |
Step 1: Gather Supplies to Ferment Chicken Feed

Fermenting grains for chickens takes 3 days before it is ready to serve to your flock. If you want to be able to offer this daily, you will need to have 3 jars, buckets or containers of fermented feed going at once.
For larger flocks, I would suggest fermenting chicken feed in a 5 gallon bucket and lid.
If you only have a small flock of 6 or less, you can easily use a 1/2 gallon mason jar or an equivalent size container.
| 1 | CONTAINER(S) |
| 2 | CHICKEN FEED |
| 3 | DISTILLED WATER |
| 4 | SPOON |
| 5 | STRAINER |
Step 2: Choosing Chicken Feed to Ferment

You can use any grains that you normally feed to your chickens, including:
- Fermenting chicken crumbles- This can be either layers crumbles or even chick crumbles for your chicks!
- Fermenting chicken grains- Read on to see what the best grains to ferment for chickens are.
- Some people choose to make their own feed, mixing both the crumbles and the whole grains.
“Can Baby Chicks Have Fermented Feed?“ Yes, even baby chicks can benefit from the increased nutrients and probiotics contained in fermented chicken feed. Follow the same steps you would for adult chickens, except use chick starter crumbles instead.
| COMMON CHICKEN FEED FOR FERMENTATION |
|---|
| CHICKEN CRUMBLES |
| CHICKEN PELLETS |
| CHICKEN SCRATCH |
| WHOLE OATS |
| WHEAT |
| SUNFLOWER SEEDS |
| FLAX SEED |
| OAT GROATS |
| BARLEY |
| FIELD PEAS |
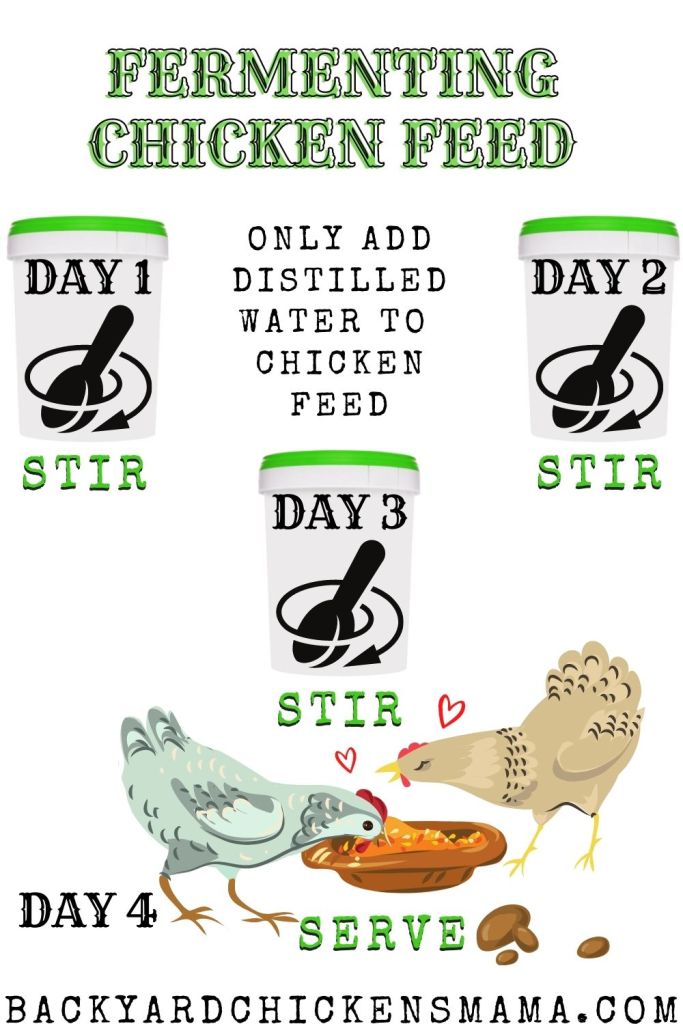
Step 3: Adding Water to Chicken Feed

It is important to use distilled water and not water straight from the hose or faucet. Water from your tap contains chlorine and fluoride, which will interfere with the fermentation process.
If you don’t have distilled water, you can use regular hose or tap water by letting it set out for 24 hours. Another way is to boil it for 20 minutes and let it return to room temperature. This will remove the chlorine and fluoride from it.

Fill your container with distilled water, making sure to cover the feed several inches. Remember, the feed will expand quite a bit during the fermentation process.
Check the feed daily and top it off with additional water to make sure that the feed is completely covered with water at all times. Loosely place the lid on your container.
The idea is to keep it covered so mold spores can’t float in, but to leave the lid loose enough that gasses can escape.


Water must always completely cover the feed for the beneficial bacteria to grow. If the feed is exposed to oxygen during the fermentation process, it can begin to mold.
If you find that your feed has been exposed to air and is beginning to grow mold, discard it.
Step 4: Stirring Fermenting Chicken Feed

Stir the feed three times a day at equal intervals. Morning, noon and night is a good schedule to try to follow.
By the end of the first day, you will notice little bubbles at the surface of the water. This is carbon dioxide gasses. These gasses occur when the glucose and starches in the chicken feed are being broken down into the beneficial bacteria.
Giving your fermenting feed a good stir helps to speed up the process of fermentation, helping it unlock the nutrients within the feed and to create healthy probiotics.
Do this for 3 days. Any longer than this and you are likely to smell an alcohol smell coming from your fermented feed. You don’t want to feed this to your chickens.
If you choose, you can do just an overnight soak and serve this to your chickens. It will still have some added benefits. But the longer you soak it, up to 3 days, the more beneficial probiotics will be in it.
The fermented chicken feed should have a slightly sweet, yogurt or yeasty smell. It shouldn’t smell sour or like alcohol. If it does, discard it.
Step 5: Straining Fermented Chicken Feed

After 3 days or 72 hours of fermenting, your feed is ready to be served to your chickens.
Make sure it smells right and doesn’t have any mold growing on it before you serve it to them. Hold your strainer over a bucket and scoop some fermented feed into it, letting the liquid drain.
Save the liquid to make another batch of fermented feed. This will speed up the process, since it already contains beneficial bacteria.
If you are not planning on reusing the liquid from the fermented feed, go ahead and scoop the feed and place it right on the ground for your flock. It will naturally strain into the ground.
Step 6: Feeding Fermented Feed to Chickens

You will notice within the first week or two that you will not need to serve as much feed to your flock. Fermented feed is packed with nutrients that your chickens now have access to and have an easier time digesting.
How Much Fermented Feed Per Chicken?
When you first start serving your chickens fermented feed, give them their regular portions and see how they do. If you notice that they are not eating as much, reduce how much you are giving to them.
Serving fermented feed to your chickens is something that you can do all the time or just as an occasional “treat” for your flock.
It is especially good to do during times of stress, such as molting, illness or transportation.
After serving a days portion to your flock, add more feed to the container and top it off with additional distilled water.
If you are reusing the liquid from a previous batch, the fermentation process may only take 2- 2 1/2 days to complete. Use your nose. If it smells yeasty or like yogurt, it’s ready to serve!

If you are looking for other nutritious DIY foods for your chickens consider giving them chicken fodder. For more information, read my article How to Make Chicken Fodder – Step by Step 7 Day Guide with Photos.
Conclusion: How to Ferment Chicken Feed
Fermenting your chicken feed is a great way to provide healthier food for your flock, grow healthier chickens, tastier eggs and to save money on feed cost. It is easy to do and will only benefit both you and your flock in numerous ways!

Meet Jenny from Backyard Chickens Mama 🐓
Jenny is a longtime backyard chicken enthusiast who has raised a variety of chicken breeds in her Northern California backyard for more than 27 years.
Favorite Chicken Breeds 🥚
Jenny especially enjoys incubating and hatching fertile chicken eggs and raising baby chicks from day one. Over the years, she has raised many different breeds and loves the colorful variety they bring to the coop and egg basket.
Together, these beautiful breeds create a colorful basket of farm fresh eggs in shades of blue, olive, brown, cream, and speckled tones.
Together, Jenny and her husband built their own chicken coop, and she and her dad built her current chick brooder setup for raising young chicks safely and comfortably.
Over the years, Jenny has learned countless practical tips and flock care routines through hands-on experience caring for her own chickens. She loves sharing those simple, realistic ideas to help others raise happier, healthier, and more productive backyard chickens naturally.
Jenny first created her original Nesting Box Herbs blend to help support calmer hens, cleaner nesting boxes, and healthy laying routines naturally.
As Backyard Chickens Mama continued to grow, additional seasonal herbal blends were developed to help support chickens year-round — including Cooling Herbs for Chickens for hot summer weather and Warming Herbs for Chickens for chilly winter months.
Today, Backyard Chickens Mama offers a full collection of natural herbal chicken care products — including their popular Seasonal Blends bundle — designed to support happier, healthier, more comfortable hens through every season.
How to Ferment Chicken Feed– https://www.backyardchickensmama.com/how-to-ferment-chicken-feed/


