
Thinking of hatching some eggs in your new incubator? The entire process, from purchasing your first incubator to watching those rare eggs you purchased from a local farmer finally hatch, is such an awesome experience!
In order to use an incubator to hatch chicken eggs you must choose one that works best for your lifestyle, get the necessary accessories that go along with hatching as well as know how to set up and operate it.
Knowing How to Use an Incubator Will Increase Your Hatch Rate!
After reading this article you will become better prepared to use an incubator to successfully hatch your own chicken eggs.
Research Incubator Types

Go online and check out several different incubators before deciding on the one you will purchase. There are pro’s and con’s to all incubators. Find one that will work best for you!
Should I Get a Forced or Still-air Incubator?
- Forced-Air Incubators have a fan that forces air to circulate throughout the entire incubator. This is the most popular type of incubator today.
- Still-air Incubators do not have a fan to circulate the air. It uses radiant heat to heat the eggs. These are a little trickier to maintain a constant temperature throughout.
I have found that forced-air incubators are quite a bit easier to maintain the proper temperature and humidity with. I only once had a still-air incubator and my hatch rate was not as good.

What is the Difference Between a Manual and Automatic Incubator?
Automatic Incubators will have all the bells and whistles. It will rotate the eggs for you and alert you when the temperature or humidity goes out of range. Some will even add additional water when the humidity drops.
Manual Incubators you will have to open the incubator and manually turn the eggs at least a few times throughout the day. The more times you can rotate the eggs, the better.
For the most part, the more money you end up spending on an incubator, the less hands on it will be. If you have a busy lifestyle, I highly recommend getting an automatic one.
Incubator Pre Set-up
Additional Items You Will Need
- Hygrometer with probe to measure temperature and humidity inside the incubator. You will also need this to calibrate your incubator prior to use.
- Sponges are used to increase humidity inside incubator.
- Non-skid liner to place on incubator floor so newly hatched chicks will not slip or develop “splayed legs.”
- Distilled water is used to fill the reservoirs to maintain proper humidity level. Distilled water is purified and free of minerals. Tap water can cause mineral build-up inside which can breed bacteria.
- Empty toilet paper rolls (for some models) are used as placeholders, to hold eggs upright on days 1-18, if you do not have enough eggs to fill a row.
- Candling light for checking to see if the eggs are developing.
- Calendar to keep track of the 21 day embryo development.
- Pencil to mark the air sac at the top of the egg and make any notes on your calendar.
Incubation Set-up for Best Hatch Rate
Before putting a clutch of fertilized eggs into your incubator, clean, test and calibrate it. Write down on your calendar when you will be setting your eggs so you know the appropriate day to “lockdown” and increase the humidity.
1. Cleaning Your Incubator

Even if it is brand new, it still needs to be sanitized. Bacteria does best in warm, moist places and a chicken egg incubator is just that! Incubators are breeding grounds for any type of bacteria that may be hiding inside it. Best off, starting with a clean one!
Depending upon your incubator, you can wash the parts without electronics attached to it with warm soapy water. Dry it completely. Always check with the manufacturers instructions to see what is recommended for your particular brand.
Take extra care when cleaning by the fan and wires of your incubator. I find that taking a cloth soaked in apple cider vinegar and wiping it down does well. The main ingredient in ACV is acetic acid and that is known to kill bacteria and stop it from multiplying.
2. Testing Your Incubator

Test your incubator out to make sure it is operating properly before you get your fertilized eggs. Eggs are only viable for up to 10 days after they are laid. After this, they gradually lose their viability.
Add distilled water to the reservoir. Most incubators have more than one reservoir. On days 1-18, only one of the reservoirs should be filled. On day 18 you will fill the second reservoir.
3. Calibrating Your Incubator

Use your hygrometer and place the temperature probe through one of the holes in your incubator. The level of the temperature probe should be right at the level where the tops of your eggs will be.
What is the recommended temperature for incubating chicken eggs in a forced-air and still-air incubator?
Days 1-21: Recommended temperature for hatching chicken eggs in a forced-air incubator is 99-99.5 degrees Fahrenheit. Still-air incubator recommended temperature is a little higher, 100.5 degrees.

What is the recommended humidity for incubating chicken eggs in a forced-air and still-air incubator?
Recommended humidity for incubating chicken eggs in both a forced-air and still-air incubator for days 1-18 is 60-65% relative humidity. Recommended humidity after day 18 is 70-75%.
If you find that your temperature is off by more than 0.2 degrees, then you need to adjust your incubator temperature. Some models this is a dial on the incubator itself, others you can get into it with the electronic menu of the machine. Read your manufactures manual for your step by step instructions on your model.
Important: On models that have a dial for temperature adjustment, only move the dial a very little bit at a time. Wait 30 minutes and check the temperature again. Turning the dial too much can be detrimental. Even a 2-3 degree temperature change can have adverse effects on an unhatched embryo.
Purchasing Eggs for Incubator

After getting the proper accessories and calibrating your incubator, it’s time to get your chicken eggs. If you are getting them from your local farmer down the street, you can get started right away.
Purchasing shipped eggs can take anywhere from a couple days to few weeks to receive them, depending upon the laying hens.
Purchasing Eggs from a Local Farmer

Purchasing eggs from your local farmer is the best way to go. This way you can see the rooster and hen that you will be hatching eggs from.
The hatch rate is also quite a bit higher with eggs that you get locally. This is because they are fresh (just laid) and are not subjected to the jostling of transportation.
Buying Shipped Eggs

Not everyone has a local farmer around. In this case, shipped eggs are the way to go. Try to find a company that is closer to you, so the eggs do not have to be in transport as long.
Buying shipped eggs is always a risk. You do not know how they will be handled by the post office. Even if the box says, “FRAGILE,” the box could still be mishandled or jostled during transportation.
When trying to find a good company that will ship eggs, look at their reviews. Make sure you find one that takes good care when wrapping the eggs prior to transport and is giving you the freshest eggs possible.

Preparing Chicken Eggs for the Incubator
Turn on and make sure your incubator is properly calibrated. Let it run for 12 hours before you place any eggs inside.
If you are putting eggs into your incubator from your own hens or from a local farmer, let them set for 12 hours, pointy side down, at room temperature. Placing cold eggs into a warm incubator can cause the eggs to crack.
Shipped eggs require allowing the eggs to rest 24 hours, pointy side down, slightly tilted, at room temperature. They should be slightly tilted every 6 hours until it is time to set them into the incubator.
Shipped eggs are more likely to have air bubbles inside of them and detached air cells. Waiting 24 hours before placing them into the incubator allows the air bubbles to settle and allows the air cells to hopefully stabilize.
Shipped and Local Egg Setting Tips
| SHIPPED EGGS | LOCAL EGGS |
|---|---|
| WAIT 24 HRS. BEFORE INCUBATING | WAIT 12 HRS. BEFORE INCUBATING |
| SET POINTY SIDE DOWN | SET POINTY SIDE DOWN |
| KEEP AT ROOM TEMP. 24 HOURS | KEEP AT ROOM TEMP. 12 HOURS |
| TILT EGGS EVERY 6 HOURS | TILT EGGS EVERY 6 HOURS |
Placing Eggs in the Incubator

After you have waited the recommended amount of time, it’s time to place your fertile eggs into the incubator.
For models that you are able to place the eggs upright, place the eggs pointy side down. This will allow the larger end to fill with the air cell, making it easier for the chick to hatch.
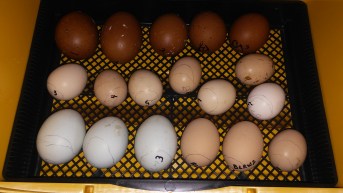
If you are able to lay the eggs flat and choose to do so, place them with the fat end slightly up. This is done so the air cell develops at the fatter end of the egg, making it easier for the chick to breathe during hatching.
Candling the Eggs
Candling is what you do to check the development of the growing embryo. It is important to do this, so you can discard the eggs that have stopped developing and avoid “bad eggs” from exploding in your incubator.
Candling is done by shining a light through the fat end of the egg. By doing this, you will be able to see blood vessels and the development of a chick embryo.

By shining a light through the egg, you can keep track of the growing embryo by marking the growth of the air cell on the egg with a pencil. In a normally developing chick embryo, the air cell should gradually enlarge as it gets closer to hatch day.
Days 3, 7, 10 and 14 are the best days to candle. Anything past 14 days and it is difficult to see very much because the chick is taking up so much space inside the egg.
What is Lockdown When Hatching Eggs?

When hatching chicken eggs, lockdown occurs on day 18 of incubation and continues until the chicks hatch. During this time, you raise the humidity level and keep the incubator closed until all the chicks have hatched.
If you see a “ring of death” during candling, you can discard them right away. The “ring of death” is a blood ring that develops when previously developing embryo dies. It is the blood vessels decomposing and forming a circle or “ring” that floats at the top of the egg.
If you are on the fence about any eggs being viable, it’s ok to wait until day 14 before discarding. But, if anything is oozing, definitely throw it out!
Lockdown

Day 18 begins lockdown. During lockdown there are a few do’s and don’ts to keep in mind to increase your odds of a successful hatch.
1. Increase Humidity to 70-75%. This can be done by filling the secondary water reservoir in your incubator. If you still have trouble increasing the humidity you can wet some sponges with distilled water and place them inside.
2. Stop Rotating Eggs– Now is the time that the baby chick is positioning itself for hatch. You want to stop rotating the egg so the chick knows which way is up. It has a better chance of successfully hatching if it “pips” at the top of the air cell.
3. Position Eggs for Hatch: You can increase your hatch rate by positioning the eggs flat, fat side slightly upward. This makes it a little easier for the chick to find the “up” position of the air cell.
4. DO NOT Open Incubator: This part is one of the most difficult parts of hatching eggs. Once you enter lockdown, you must leave the incubator closed.
5. Once a chick breaks through the inner membrane of an egg, if it is exposed to a quick drop in humidity, it can become shrink wrapped inside of the membrane, making it impossible to rotate within its shell to hatch.

Tip: If you must open the incubator, I recommend bringing the incubator into a warm, humid area (such as the bathroom). Turn on the shower and bring the bathroom humidity up to 70% before opening the incubator.
Chick Hatch Day

21 days have gone by and your incubator is filling with adorable baby chicks. Once your chicks have dried off completely, it is ok to move them to your brooder box.

Conclusion: How to Use an Incubator to Hatch Chicken Eggs

Knowing how to use an incubator will increase your hatch rate and is key to a successful hatch of healthy, adorable baby chicks. Combine this with preparing your incubator before you get your eggs and making sure you have the essential accessories, you are setting yourself up for a successful hatch!


