Most chickens will naturally wear down their nails by scratching the ground, but from time to time you may find you have a chicken that needs its toe nails trimmed. This may be because it is older, sedentary, a very broody hen or just not exposed to enough scratching opportunities. It is in these situations that it is important to know how to trim a chicken’s nails.
Should I Trim My Chicken’s Nails?
If you have a chicken with overgrown toe nails or curled toe nails, they need to be trimmed. A chicken with overgrown nails can have difficulty walking, roosting, scratching and can be in pain if they grow into its foot.
How to Trim a Chicken’s Nails – 5 Simple Steps
“How do I trim my chicken’s toe nails?” is one of the most common questions from people that own chickens. Most chickens take care of this task on their own, but if you have to do it yourself, it doesn’t have to be a scary thing for you to do. It is actually quite simple if you follow these 5 simple steps:
1. Gather Essential Supplies to Trim Your Chicken’s Nails
- Bowl of warm, soapy water to clean its feet
- Nail Trimmers– You can use dog or cat nail trimmers. If you don’t have these, a pair of adult nail trimmers will also do the job.
- Rubber Gloves to protect your hands when cleaning your chicken’s feet.
- Towel to securely wrap your chicken in. This is optional, but if you have a flighty chicken, this may help to make it fell more secure.
- Styptic powder, cornstarch or baking soda to stop bleeding, just in case you accidentally cut the quick of the nail.
- Paper towels or clean rag to put direct pressure on a bleeding nail.
- Nail file (optional) to file down the rough edges of the trimmed nail. Most chickens will take care of this on their own by scratching the ground.
2. Clean Your Chickens Feet
Clean your chickens feet before trimming its toe nails. A chickens feet are filled with bacteria from dirt, chicken poop and at least a dozen other harmful things. Just in case you accidentally trim into the quick, it’s best to start out with clean feet. This way you are less likely to introduce harmful bacteria into it.
- Get a shallow plastic container and fill it with some warm water.
- Add a few drops of soap to this. I like to use Dawn Dish Soap. Agitate it enough to turn it into soapy bubbles.
- Place one of your chicken’s feet in the bath at a time and gently rub (with gloves) any debris off of its foot. Repeat with the other foot.
3. Securely Hold Chicken When Trimming Nails
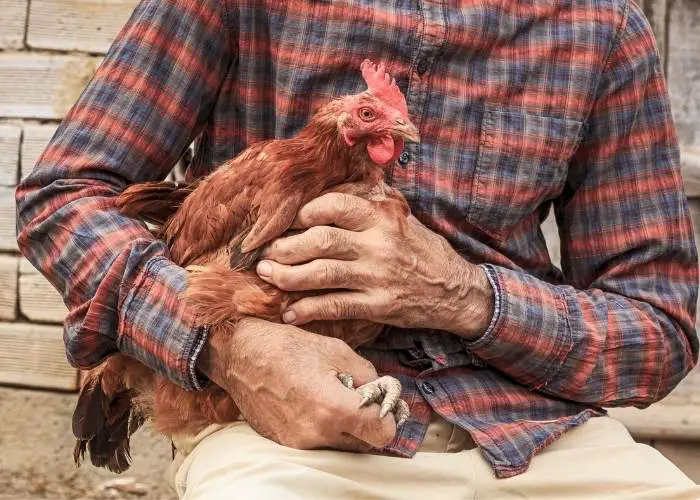
It is important to hold your chicken securely when trimming its nails so you don’t accidentally cut too far. If its wings are not securely held down, it can easily start flapping and get away from you. As long as you can securely hold its wings from flapping, you are fine.
If this is your first time trimming your chicken’s nails, you might want to have someone else hold your chicken while you trim.
You will want to take care when holding your chicken down when you are trimming its toe nails. The last thing you want is to injure your chicken during the procedure.
How to Hold a Chicken When Trimming Its Nails

- Tuck your chicken under one arm, facing away from you. If you have a very flighty chicken, you may find that wrapping it in a towel will help to make it feel more secure.
- The important thing is to make sure that its wings are securely held down.
- Use the other hand to locate the quick and trim the nail.
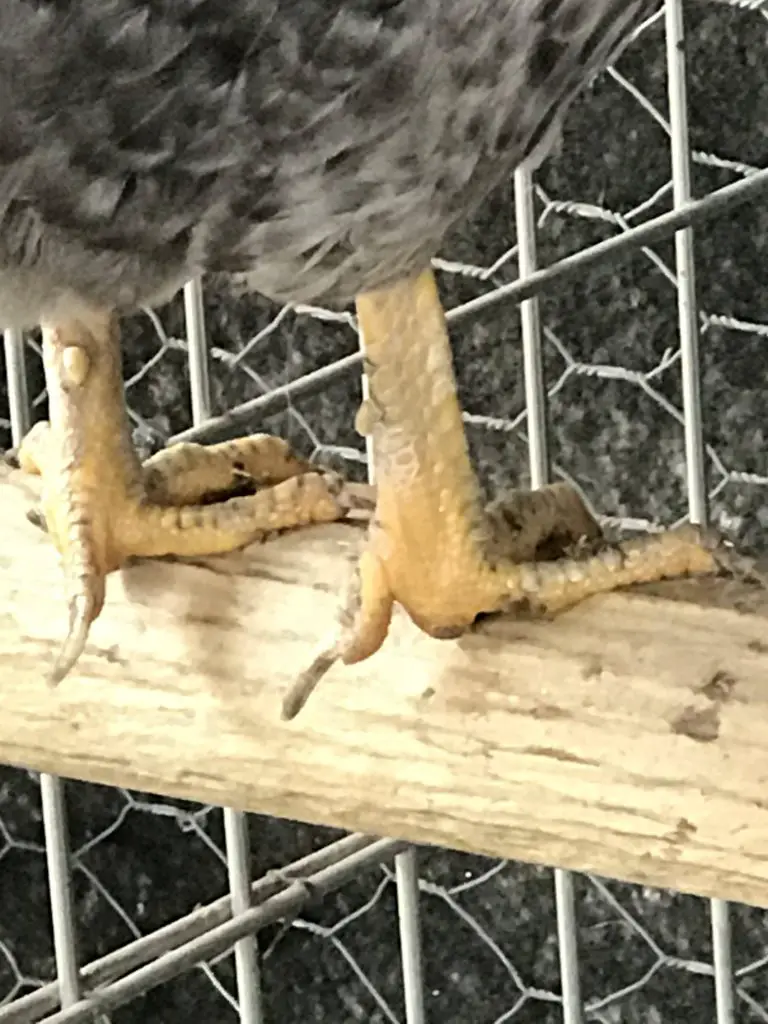
4. How to Find the Quick on a Chicken’s Toe Nails
How do You Stop a Chicken’s Toe from Bleeding?
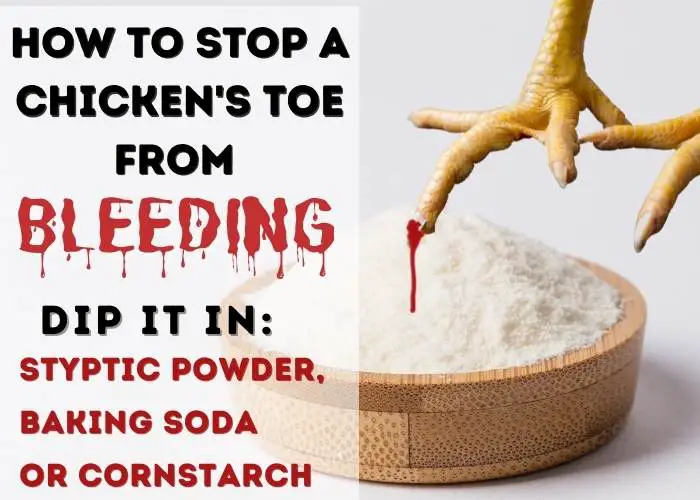
If you cut into the blood supply of a chickens nail, the quick, it will bleed. It is important to have something to stop it from bleeding. The best thing to stop a chickens toe nail from bleeding are by using Styptic powder, baking soda or cornstarch.
Styptic powder is what most vets use and is recommended because it contains an antiseptic to help kill any germs that may have got into the wound. It also helps to stop the bleeding by causing the blood vessels to contract, causing it to clot. Dip the bleeding nail directly into this and it should quickly stop the bleeding.
If you do not have any of these on hand, use a clean towel to apply direct pressure to the wound. Raise your chickens foot just slightly above its heart level. Hold the towel firmly on the wound for up to 15 minutes.
If your chickens toe continues to bleed after applying direct pressure for several minutes, it is important to call a vet.
5. Trimming a Chicken’s Toe Nails
If you notice that your chickens nails are overgrown or beginning to curl, then you need to trim its nails. If a chicken’s unruly nails are left alone, it can lead to problems with walking, roosting and can even grow into its own foot. This can be very painful for a chicken.
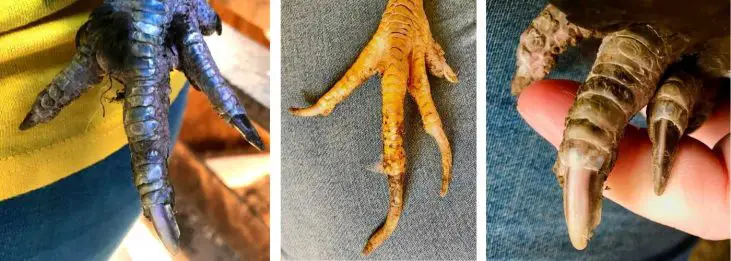
Chickens have a small vein inside each of their nail shafts (just like dogs and cats). This is what you are trying to avoid clipping during the nail trimming. When you clip its nails, you want to clip about 1/4″ from the vein.
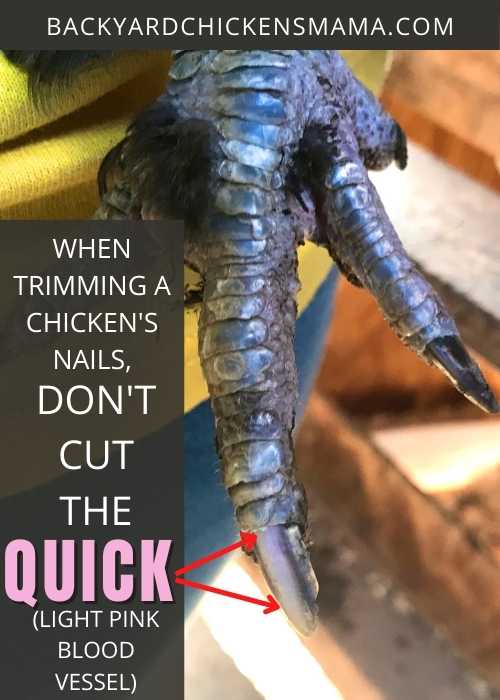
Nail trimming is easiest on breeds with lighter colored nails and can be more difficult on breeds with darker nails. If you need to, grab a bright flashlight and shine it through the nail. You will see a color change. This is where the quick ends.
When in doubt, make little clips. If you notice that the nail is beginning to change color, stop! This color change means you are getting very close to the quick of the nail.
How Long Should Chicken Nails Be?
A chicken will naturally wear its own nails down to about 1/4″ from the quick or small blood vessel within the nail. If a chicken doesn’t do this on it’s own, you will need to trim the nail until it is about 1/4″ from the quick.
In breeds that have white nails, this is easier to see. The quick or little blood vessel is a light pink color. Darker nails are a little more difficult to see this quick. This is when a flashlight comes in handy. Shine a bright light through the nail to get a better look.
NOTE: As a chicken’s nail grows in length, so does the quick (the small blood vessel within the shaft). In order to shorten the nails, you will need to trim up to 1/4″ of the quick. Give the quick 1 week to recede, then trim again. Repeat until the nails are to the desired length.
A chicken’s nails do not have to be real short, just as long as they are not curled and do not interfere with its gait, roosting, scratching, etc.
Should I Trim My Rooster’s Spurs?
A rooster uses its spurs to protect its hens and also to hang on to a hen while mating. Spurs that are not trimmed will continue to grow and can hurt a hen, especially if the rooster is aggressive. Spurs contain a small blood vessel, just like the other nails and can be trimmed within 1/4″ of the this “quick.”
CONCLUSION: How to Trim a Chicken’s Nails- 5 Simple Steps (+Photos)
- First, gather all of the essential nail trimming supplies.
- Second, clean your chicken’s feet to prevent germs from spreading in case you cut into the quick.
- Hold your chicken properly while trimming its nails. If this is your first time trimming, get a second person to hold your chicken for you.
- Locate the quick of each toe nail and have supplies ready to stop bleeding if you cut into the quick.
- Trim your chicken’s nails.

